Sunday, September 23, 2012
Sherry Raisin Bread
You've heard it here before: in this house we're all about The Toast. I can't even remember the last time I made (or ate) a sandwich; our bread, baked in a loaf pan, is invariably consumed after a trip through the toaster.
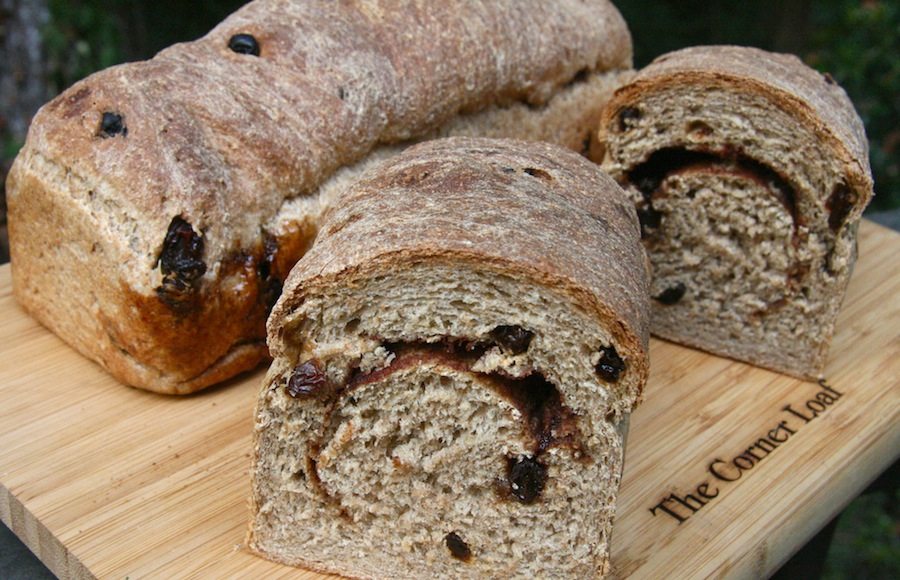
My favorite bread-baker, Dan Lepard, recently published a recipe for Sherry Raisin Bread, Here's how Lepard explains the role of the sherry: "using it instead of milk or water, sherry adds a gentle flavour that lends richness without being immediately detectable." Doesn't that sound good?
Lepard said how good it was toasted, and I knew I had to make the bread. My baking buddy Kayte, who blogs at Grandma's Kitchen Table, was up for a virtual bread bake, so we baked "together" via electronic communication. She made her dough into rolls for the week's sandwiches, but you know that I stuck with the loaf, because: Toast.
n.o.e.'s notes:
- you can find the recipe here.
- I followed the recipe's ingredients, except I skimped a bit on the measure of raisins and almonds. There were still plenty of each in the dough.
- The sherry is not the only distinctive ingredient. The recipe also calls for adding marmalade to the dough. I used Branches Three Citrus Marmalade from Katz Farm. Milk, a substantial proportion of rye flour, and bread flour complete the flavor profile
- Dan Lepard baked this bread as a hearth loaf, but I split my dough into three smallish loaf pans, to better optimize the bread for Toast.
- My dough took longer to rise than the recipe's times. This is unusual for me with Dan Lepard's recipes, which are usually spot-on in my kitchen. I gave the extra rising time until it rose close to the appropriate amounts. Even so, the crumb of the finished bread was pretty dense.
the verdict:
Even though the bread didn't rise to lofty heights, oh, my, it was exceptional in flavor. We loved it toasted with butter, and it was pretty darned good just sliced and eaten plain.
To see how this recipe tuned out as buns, check Kayte's post. (hint: they look amazing!)
Monday, September 17, 2012
The Challah of My Dreams
I've baked challah before and posted it on this blog. I told you then about the mythic challah of my adolescence. Here's the condensed version: when I arrived for my weekly babysitting job there was always a fresh-baked loaf of Sabbath challah, baked by the mother of the family. As much time as I spent with that family, helping with nearly every aspect of their lives, bread-baking is one task that I never assisted or even watched. And it never crossed my mind that I would ever (ever) bake bread myself. I have several recipes from that family, but not their challah recipe.
It took me more than 30 years from those babysitting days, but eventually I did start to bake bread. And thanks to the Bread Baker's Apprentice, I baked that first challah (about 3 years ago). That challah was good bread, to be sure, but it wasn't the bread I've dreamed of ever since I left that family to go to college.
As luck would have it (thank you, luck!) one of the friends I've made since beginning this baking-and-blogging thing is a marvelous baker from Vermont named Rebecca, who blogs at Grongar Blog (cool, right?) Rebecca shared her challah recipe with me, and I couldn't wait to try it. And then, once I made it, I couldn't wait to bake it again!
It's that good.
Rebecca has posted her challah recipe today, in celebration of the Jewish New Year, and I'm joining the celebration by posting my challah loaves too. For the recipe, click over to Rebecca's post. She made the traditional-for-Rosh-Hashanah round shape, which symbolizes the cyclical nature of time, circling back on itself.
I made my loaves a little while ago, as long braids: first I made a regular three-strand braid:
Then I tried a six-strand braid, using a Youtube tutorial (below). Once I got in the swing of things, the braid went fairly smoothly. It definitely wasn't perfect, but it was tons of fun and I love the way the bread turned out:
To make the six-strand braid I used this tutorial. Easy Peasy!!
This bread tastes exactly like the challah of my youth; you cannot imagine how happy that makes me! Thank you, Rebecca, for sharing your recipe with me, and now, with all of us. Happy New Year!
Saturday, September 1, 2012
Quick and Tasty Hamburger Rolls
We consume far more loaf bread - nearly always for morning toast - than we do any other kind of bread. I'm always happy when I have an excuse to bake a hearth loaf or, better yet, rolls. I love forming little balls of dough and shaping them into mini boules, or knots, or cloverleafs. And then there's the cute factor when they're baked and nestled into a basket, or lined up on a tray.
Last week my friend Kayte was baking a new recipe for hamburger rolls. We were about to host a dinner party, and I baked along in my kitchen, making mine into dinner rolls.
n.o.e.'s notes:
- You can find the recipe on Kayte's blog post.
- The recipe is called "French bread" which made me think we'd have mini baguettes with a chewy crumb, but when I saw the ingredients I realized it was more an enriched white bread - with egg in the dough.
- I had no active dry yeast in the house but I did have some lovely fresh yeast, so that's what I used.
- There's a lot of yeast in the recipe - 1 tablespoon active dry - so the dough rose really really quickly. On the first rise I actually punched it down and let it rise again, to give the dough time to build some flavor.
- I used around 2 oz of dough for each roll. They could have been even a bit smaller for dinner rolls.
- The egg white wash gives a nice shiny, golden brown finish to the crust.
the verdict:
This recipe produced a nice, soft roll that was a perfect accompaniment to dinner. I liked the rolls even better when I split and toasted one, and spread it with butter.
I'd also like to try these as hamburger rolls, maybe comparing side by side with my favorite recipe (Beautiful Burger Buns from King Arthur Flour) to see which one comes out on top!
Labels:
direct,
enriched,
fresh yeast,
rolls,
white flour
Tuesday, February 14, 2012
BBA White Bread, variation 3
After baking bread more and less steadily over the past few years, one thing that I've learned (and relearned): bread is forgiving. It's not usually difficult, and it rarely requires much hands-on work, but there is a fair amount of time waiting for the yeast to do its work raising the dough. This process can be manipulated, and a simple bread can be baked in increments over a day or two rather than in one long session.
Such was this case with this bread in my kitchen. It was kind of a busy day when I tackled this bread, and and the process of making it took me from 10am in the morning to 1am the next morning. It became an exercise in me waiting for the dough and the dough waiting for me!
n.o.e.'s notes:
- I made full recipe of this bread. Peter Reinhart's Bread Baker's Apprentice has three different variations of White Loaf Bread. I baked Variation 3 first because I had milk on hand that I needed to use up. [I later baked Variation 2, using buttermilk, but have skipped Variation 1, which calls for powdered milk. At some point I might revisit that formula]
- This recipe starts with a sponge of warm milk, flour, and yeast. My sponge was a bit stiff, so I probably should have added more liquid. It never bubbled but it did swell. After more than an hour, I added the other bread ingredients, mixing the dough first in the food processor and then finishing kneading it by hand. It was looking as though the dough would need some more liquid, but when I added the fat to the recipe - I melted the butter so it would be liquid - the dough was perfect in texture.
- My schedule didn't permit me to continue with the bread in one continuous session, so I put the dough in a rising bucket and straight into my fridge. The dough was warm, and it rose as it cooled in the fridge - when I checked on it later I saw that it had nearly doubled!
- I deflated it the dough intentionally and let it warm to room temperature and rise as it warmed. Once the dough had doubled, I divided it then formed the loaves, placed it into bread pans and parked them back in the fridge while I attended a meeting.
- There really wasn't that much dough. I weighed it, and a full recipe of the bread - supposed to be 2 loaves - weighed just a bit more than the weight of one loaf in my standby Milk Bread recipe, so I measured out the amount of dough that goes into the typical milk loaf - 450g, and placed in a smallish loaf pan (the size I use for the milk loaf usually - it's about 7x3"). The remainder - about 575 g, went into the 8.5x4.5" pan.
- After the meeting I pulled the pans out of the fridge, let it warm and rise. I could have left the bread refrigerated overnight and baked the next morning. Retarding the dough helps develop the flavor, so baking in an interrupted fashion always has a silver lining!
- Before popping the bread into the oven, I slashed the tops with the lame and rubbed some oil into the slash.
- Even with adjusting my pan sizes, the loaves were still pretty petite. Next time I'd bake this recipe as one loaf in one larger (9x5) pan, or as sandwich rolls.
the verdict:
The bread had a close crumb, moist, soft, and golden. It was sweet and eggy in flavor. We used it for toast, but I think it's better suited for sandwiches, either in loaf or in roll form.
Labels:
BBA Challenge,
loaf,
Slow and Steady,
toast,
white flour
Wednesday, February 1, 2012
Old Fashioned Raisin Bread, No Cinnamon
Nick Malgieri has released a recipe for Old Fashioned Raisin Bread as a foretaste of his upcoming bread book (it is called BREAD, and will be released in September.) My baking friend Phyl is a friend of Nick's, so with just two degrees of separation you could pretty much say that Nick and I are buddies!
Over the weekend Phyl decided to bake the raisin bread and the recipe looked so appealing, I decided to join him in the kitchen, virtually that is, since Phyl is in Ohio and I was in California. It turned out to be a regular bread-fest, as Kayte in Indiana also baked the bread. Because of schedule constraints I had to retard mine in the fridge between rises so the other two bakers had each baked, sliced, photographed, consumed, and blogged their loaves before mine even made it into the oven! You can read about Phyl's bread here and Kayte's bread here.
n.o.e.'s notes:
- The raisin bread recipe is on baker Nick Malgieri's blog post.
- I made half a batch - one loaf - in my long thin loaf pan. Everything was exactly per the recipe, except that I mixed and kneaded the dough completely by hand.
- This is an easy one day bread, using the direct method of mixing, rising, shaping, rising, baking.
- I love that the recipe calls for two kinds of raisins (or currants). I reduced the quantity of raisins just a bit, and there were still lots of raisins in each slice of bread. Most of the slices had more raisins than the ones in the picture, actually.
the verdict:
This is a lovely bread, with a soft crumb and, and little pops of sweetness from the two kinds of raisins. Although I was tempted to put a cinnamon swirl into this loaf, it really is nice just as a plain raisin loaf, especially toasted with a slick of salted butter.
We had the toast for dessert after dinner and it was the perfect ending to a meal. My husband couldn't stop exclaiming over this bread, which left me wishing I had made the full recipe!
I'm submitting this bread to Yeastspotting, a weekly roundup of all things deliciously yeasty. Click over there to see what's baking in ovens around the world; new posts go up each Friday.
Monday, January 16, 2012
Pain a l'Ancienne {bba}
It's been quite a while since I've posted a hearth bread on this blog. Truth be told, I don't bake many hearth loaves; most of the bread consumed in our house is in toast form, so I'm usually baking bread in loaf pans to be sliced and toasted for breakfast. And (maybe because I make so many sandwich/toast loaves) I'm not very comfortable baking hearth loaves.
At any rate, Peter Reinhart's book The Bread Baker’s Apprentice has a hefty share of free-form loaves, so I inevitably get some practice as I make my way through the book as part of the Bread Baker's Apprentice Challenge - an endeavor that I am still erratically pursuing, although I will be skipping the part of the challenge that deals with sourdough starters. It's a bit too much of a challenge for me right now! Anyway, enough digression.
The next bread from BBA is the Pain a l'Ancienne, a venerable baguette in which all of the flavor of the wheat is unlocked via a process of delayed fermentation at controlled temperature, ie, using cold water and storing the dough in the refrigerator for a time.
Although it sounds pretty complicated, if you follow Reinhart's directions it comes together fairly easily. I'm still not very confident in my bread-shaping abilities, but my loaves turned out decently and I have to say the aromas wafting through my kitchen as the bread baked were tantalizing!
n.o.e.'s notes:
- I made half recipe of this bread, which yielded three baguettes.
- I have to admit that I didn't keep many notes when I was making this bread, but you can see step by step photos of how this bread is made on this post by BBA Challenge founder Nicole. Members of the Challenge are asked to not post the recipe.
- The crust of my bread developed a beautiful golden color, but the crumb was a bit denser than I would have liked - some big holes would have been lovely!
I ordered this cool bamboo cutting board here after hearing about it from Jaden of Steamy Kitchen
I served this bread to my to book group, and it was a resounding hit with everyone. I was smitten with the chewiness and flavor of this bread; in fact it might be the best loaves that I've ever baked!
If I had my druthers, I would have preferred large airy holes inside, but who can quibble when the bread tastes this good?
Labels:
BBA Challenge,
hearth,
reinhart,
Slow and Steady,
white flour
Wednesday, November 30, 2011
River Cottage Basic Bread
I was lucky enough to find The River Cottage Bread Handbook by Daniel Stevens at the library recently. I've been intrigued by the series of cookbooks put out by River Cottage, an English food-based entity founded by Hugh Fearnley-Whittingstall. In its words, River Cottage stands for "less dependence on the outside world, food integrity, and the consumption of local, seasonal produce." River Cottage runs a variety of programs and coordinates its activities with several different charities.
My daughter ALE has used the River Cottage Preserves Handbook with notable success, and I was eager to dive into the bread volume. The first part of the book sets out in great detail the principles behind bread and how the ingredients interact with each other. I decided to start baking with the first recipe, the Basic Bread, which is more of a formula. The basic recipe gives a lot of leeway to choose the type of flour, the liquids, the (optional) fat and sweetener, as long as the same baker's percentages are maintained.
n.o.e.'s notes:
- To see a very basic form of the recipe, click here.
- I made a half recipe, yielding one large loaf of slicing bread. The recipe, as I made it, is at the end of this post.
- For this first loaf, I stuck with my favorite combination of bread ingredients: part whole wheat flour, milk, honey, and olive oil. This made it somewhat similar to Dan Lepard's Milk Loaf, except that the River Cottage formula is less hydrated: 300g of liquid per 500g of flour, to Lepard's 350g liquid to 500g of flour.
- I used freshly ground hard red wheat for 30% of the flour, and the remaining 70% was all-purpose flour.
- The liquid I added was milk, and I included optional fat (olive oil) and sweetener (honey).
- I began kneading in food processor, but the processor I was using proved to be too small for the job. So I finished kneading the dough via Dan Lepard's method: brief kneading alternated with 10 to 15 minute rests. The dough was pretty stiff, so I ended up adding a bit more milk.
- In the recipe, Stevens says that you can deflate and then let the dough rise up to four times, and it will improve the bread's flavor. I gave my dough lots of resting periods, in between the kneading.
- After shaping the loaf, I coated in whole wheat flour before putting it in the bread pan. This was a new technique for me. Here's the way Stevens explains this step:
You can leave your loaves naked, but they will be much more grateful - and feel much more beautiful - f you give the a lovely coat to wear. Select a flour, or choose grains and seeds.- The loaf rose beautifully as it baked.
- I started baking the bread in a very hot oven then I turned it down to around 350 degrees because it was so browned.
the verdict:
This was a fun bread to make, especially coating the outside of the bread with flour. I like the resulting crusty crust on the sandwich loaf. The loaf's crumb was sturdy and soft at the same time. This bread made lovely toast.
the recipe:
Whole Wheat Loaf with Milk and Honey
adapted from The River Cottage Bread Handbook by Daniel Stevens
350 g all-purpose flour and 150 g whole wheat flour (4 cups total flour)
5 g instant yeast (1/2 T)
5 g fine salt (2 tsp)
300 g(ml) milk (1 1/4 c) (warm)
a good slug of olive oil (or could use 2 tsp butter)
1 handful of whole wheat flour, for coating
- Mix the ingredients in a large bowl, then knead the dough by hand on an oiled counter until satiny (about 10 minutes). Alternatively, mix the ingredients in a large food processor, dry ingredients first then add the wet ingredients steadily while the motor is running. Pulse for about a minute, then test the dough to see it forms a windowpane when stretched between your fingers.
- Form the bread into a round and put in an oiled bowl to rise until doubled, approximately an hour, depending on the temperature of your kitchen.
- Knead the bread to degas it then form into loaves as desired and coat the bread in whole wheat flour. If you're making sandwich loaf, place the dough in an oiled and floured 1 pound size loaf pan. Allow loaves to rise, covered loosely with a plastic bag, until nearly doubled.
- Bake the bread at 525 degrees (500 convection) for 10 minutes. A steam method is recommended, as well as spritzing the bread first with water before placing it in the hot oven. The recipe also specifies that the loaves be slashed. I slashed but didn't steam my loaves.
- Turn the oven down to 425, 375 or 350 degrees, depending on how brown the crust is getting, for about 30 more minutes, until the loaves sound hollow when tapped, or register about 195 degrees on an instant read thermometer.
I'm submitting this bread to Yeastspotting, a weekly roundup of all things yeasty.
Sunday, October 16, 2011
Fancy & Delicious Cinnamon Raisin Bread
I'm fairly new to baking bread; my kitchen's first yeasted baked good was less than three years ago. Since then I have had lots of fun turning out bread, and have introduced both of my girls to the basics of working with yeast. My daughter ALE took off running, and has become a proficient bread-baker. She fearlessly tackles things which are far out of my league: maintaining a sourdough starter, working with spent brewing grains, and baking in an outdoor hearth oven at temperatures far exceeding the typical home oven.
Since the beginning of the summer, ALE has been baking bread with the Fancy & Delicious bread collective in Buffalo, NY, to sell at market and for a bread share program. (see an article about about Fancy & Delicious here and a lovely video here)
One of the collective's most popular breads is the Fancy & Delicious Cinnamon Raisin Bread. When ALE came home for a visit in August, she baked up a batch of the bread for us (that's her loaf in the picture, above) and left me with the recipe. At the moment, it's become our favorite "daily bread" - the stuff of my husband's morning toast.
I'm posting this bread today in honor of World Bread Day, and also as part of my friend Di's Handmade Loaf Event. Additionally, I'm sending the bread to Yeastspotting, a weekly roundup of all things yeasty.
n.o.e.'s notes:
- The recipe is for 3 moderately-sized freeform loaves, but I used two long loaf pans (1 pound size) and ended up with perfectly-sized loaves for toasting. I oiled and floured the pans, and lined the bottoms of the pans with parchment.
- There are a variety of slightly different versions of is bread recipe. The recipe, as I baked it, is below.
- You can use whatever combination of white and whole wheat flour you like, as long as the total is 6.5 cups. I measured by weight, at 4.5 oz/cup, then adjusted for dough consistency.
- For richer flavor, you can add butter to the cinnamon swirl as you prefer
- At Fancy & Delicious, they mix the dough in a commercial stand mixer. I used a food processor (the dough really filled my large food processor), but you could definitely mix and knead the dough by hand.
- Add the liquid gradually, just enough for good dough consistency, because the dough can get quite slack with too much liquid.
These are my loaves, made in a bread pan. For this batch I mistakenly was short on both raisins + cinnamon swirl.
the verdict:
The minute I tasted this bread I could see why the loaves consistently sell out when Fancy & Delicious sells bread at market. A toasted slice was a perfect cinnamon-raisin experience! It's nutty from the whole grains, and sweet from the raisins and the luxurious swirl of cinnamon sugar. We love this bread so much that I've made it again and again, and now it's my go-to for cinnamon-raisin.
the recipe:
the recipe below is how I made the bread. My friend Kayte baked the bread using the one-loaf recipe variation that the Fancy & Delicious collective uses when it teaches bread workshops. You can see her loaf and get that recipe here.
Fancy & Delicious Cinnamon Raisin Bread
6 1/2 cups of flour: any combo of white/whole wheat flour works fine. (I used about 2 1/2 cups of whole wheat, and included some rye and some oat flour)
1 Tb yeast
1 tb cinnamon
2 tsp salt
1 cup milk
1/4 cup honey
splash oil - I used mild olive oil
1 3/4 cups warm water, or less, adjusting for dough consistency (can be room temperature if you use a food processor for kneading)
1.5 cups raisins
3/4 cup cinnamon-sugar blend per loaf (1 part cinnamon, 5 parts sugar)
1. Mix the flour, yeast, cinnamon, and salt, to combine
2. Gradually add the milk, honey, oil, and water, adjusting quantity of liquid to the consistency of the dough.
3. Knead until the dough passes the windowpane test. In a food processor this will take about a minute.
4. Knead in the raisins. If you have been using a food processor, add the raisins by hand.
5. Turn the dough into an oiled bowl, cover, and let the dough rise at room temperature until doubled in volume.
6. Divide the dough and form into desired number of loaves, shaping as follows:
To shape dough:
a. Prepare 8.5x4.5 bread pan: butter pan and cut parchment to fit pan (so cinnamon sugar will not cause bread to stick to pan), butter/flour parchment.
b. Shape dough into rough ball and grab a rolling pin.
c. Roll dough into a rectangle 1/2" thick.
d. Spread the 1/4 cup cinnamon sugar over middle of the bread, leaving an inch around all the edges.
e. Start rolling by turning a short edge inward.
f. Roll tightly until a cylinder is formed.
g. Press down edges, turn seams under, roll on work surface until sealed.
If using loaf pans, place into pans seam side down. Let loaves rise at room temperature until doubled.
7. Bake in 400 degree oven for 40-45 minutes, until loaves sound hollow when tapped on the bottom and the internal temperature is 195 degrees on an instant read thermometer.
Thursday, July 28, 2011
Bread Links
I've come across some fun and interesting bread-related links this month, and thought I'd share them with you!

I hope to post some more bread soon, but in the meantime, happy reading!
1.
Here's an article about the Fancy and Delicious Bread Cooperative in Buffalo NY. My daughter is the one pictured at the top of the article, wearing an apron made by her great grandmother, who, incidentally, baked delicious Parker House rolls. If you live in the Buffalo area, stop by the farmer's market to buy some bread, or sign up for a 12 week bread share (starting this week!). To keep up with the co-op activities, check out the Fancy & Delicious blog.2.
A very cool event is happening in Maine this week: the 5th Annual Kneading Conference, on Thursday, July 28th and Friday, July 29th in Skowhegan, Maine. The Kneading Conference "brings together novice and professional bakers, grain farmers and millers, researchers, wood-fired oven enthusiasts and anyone who loves to eat handcrafted breads for two-days of participatory workshops, presentations, and panel discussions." The conference is followed immediately by The Maine Artisan Bread Fair on Saturday, July 30th. If the dates and locations don't fit, there will be a related Kneading conference West on September 15-17 in Mount Vernon, Washington. Details on all these events can be found here.3.
Learn how Hot Bread Kitchen in Harlem is helping immigrant women pursue meaningful work as bakers.4.
In case your interest in yeasty products runs to the academic and/or historic, here's a post about bread in the middle ages. Fascinating info!I hope to post some more bread soon, but in the meantime, happy reading!
Sunday, July 17, 2011
BBA Slow & Steady: Mulitgrain Bread Extraordinaire Roundup
Although I am dreadfully behind on posting our results, the bakers of the Slow and Steady subgroup of the BBA Challenge are still working their way through the book. Several of them have pressed on into the sourdough section and are currently nearing the end of the book The Bread Baker's Apprentice!
Their progress has inspired me to pick back up and post the next in the series of Slow and Steady roundups. We all baked the Multigrain Bread Extraordinaire sometime back in 2010, but better late than never, right? Here is how the bread, which is famous for turning out extraordinary toast, turned out in our kitchens:
Leslie of Lethally Delicious baked this recipe as rolls, and found the flavor to be "rich and deep." Read Leslie's post: BBA - Multigrain Bread Extraordinare

The fourth time's a charm, and after a few failed attempts at making the soaker for this bread, Jessica of The Singleton in the Kitchen, with brown rice on hand, found the bread easy enough to make. As for the taste: she didn't find it to be "bread nirvana" but she reports that the toast was a pleasant way to begin her day. Her post: BBA S&S: Loafin' Around
^^^^^^^^^^^^^^^^^^^^^^^^^^^^^^^^^^^^^^^^^^^^^^^^^^^

Natalia of Gatti, Fili e Farina
loved this bread so much that she got hungry for some when she was writing her post.
her post: BBA Slow and Steady: Multigrain Extraordinaire

Kayte of Grandma's Kitchen Table thought that her bread wasn't much in the looks department (I beg to differ!) but loved the taste. Her family enjoyed this bread as toast, grilled cheese and sandwiches. Her post: BBA: Mulitgrain Bread Extraordinaire
Their progress has inspired me to pick back up and post the next in the series of Slow and Steady roundups. We all baked the Multigrain Bread Extraordinaire sometime back in 2010, but better late than never, right? Here is how the bread, which is famous for turning out extraordinary toast, turned out in our kitchens:
^^^^^^^^^^^^^^^^^^^^^^^^^^^^^^^^^^^^^^^^^^^^^^^^^^^^
Leslie of Lethally Delicious baked this recipe as rolls, and found the flavor to be "rich and deep." Read Leslie's post: BBA - Multigrain Bread Extraordinare
^^^^^^^^^^^^^^^^^^^^^^^^^^^^^^^^^^^^^^^^^^^^^^^^^^^^^^^
The fourth time's a charm, and after a few failed attempts at making the soaker for this bread, Jessica of The Singleton in the Kitchen, with brown rice on hand, found the bread easy enough to make. As for the taste: she didn't find it to be "bread nirvana" but she reports that the toast was a pleasant way to begin her day. Her post: BBA S&S: Loafin' Around
^^^^^^^^^^^^^^^^^^^^^^^^^^^^^^^^^^^^^^^^^^^^^^^^^^^

Natalia of Gatti, Fili e Farina
loved this bread so much that she got hungry for some when she was writing her post.
her post: BBA Slow and Steady: Multigrain Extraordinaire
^^^^^^^^^^^^^^^^^^^^^^^^^^^^^^^^^^^^^^^^^^^^^^^
Kayte of Grandma's Kitchen Table thought that her bread wasn't much in the looks department (I beg to differ!) but loved the taste. Her family enjoyed this bread as toast, grilled cheese and sandwiches. Her post: BBA: Mulitgrain Bread Extraordinaire
^^^^^^^^^^^^^^^^^^^^^^^^^^^^^^^^^^^^^^^^^^^^^^^

I baked this bread and posted it before the Bread Baker's Apprentice Challenge. In fact, this bread is what convinced me to purchase Reinhart's book (I baked the bread from versions of the recipe I found online) See my post here. The bread makes such great toast that it's worth keeping little bits of cooked brown rice and other grains in the freezer so that the bread can be baked on short notice.
Labels:
BBA Challenge,
partly whole grain,
reinhart,
Slow and Steady
Subscribe to:
Posts (Atom)